Connecting Astra DB to Claude Desktop Using the Model Context Protocol (MCP)
AI is pretty useless… Unless you contextualize it with your data. To do that we use a bunch of methods that fall under the category of “Retrieval Augmented Generation” or RAG. One way to do this is to give the AI a bunch of data in the system prompt. But that’s not always practical.
Another way to do RAG is to give AI a set of tools to use. These tools are functions that the AI can call to get information from your data. The AI can then use this information to generate a response. Of course, there are a couple of ways to give AI tools, the newest one is to use the Model Context Protocol (MCP).
In this article we are going to connect some Dungeons and Dragons monsters to a Claude 3.5 Sonnet model. We will use the desktop version of Claude to do this because it’s easy to set it up with a local MCP server to connect it to our data.

If you aren’t into D&D when we talk about monsters they are the things that players fight. They have a bunch of stats like hit points, strength, dexterity, constitution, intelligence, wisdom, and charisma. And we are going to offer the AI some tools that allow it to get information on a specific monster by name, as well as get a list of monsters that are similar to a given monster.
To do all that we are going to create a MCP server. The final code for the server is in this monster-server GitHub repo.
Setup
First we need to load up some data. I’ve created a script to load up a Datastax Astra DB collection with the monster data. You can find the script in the scripts/load.ts file.
First you need to create the monster_list collection on the Astra DB site. From there you’ll get the ASTRA_DB_API_ENDPOINT and ASTRA_DB_APPLICATION_TOKEN environment variables that you’ll add to your script.

Run the script with ts-node scripts/load.ts.
That’s going to set up a collection called monster_list with the monster data.
If everything goes well you can check out the Astra DB admin panel and have a look at your new collection. It should look something like this:

Creating the MCP Server
Now that we have the data loaded up we can create the MCP server to connect it to Claude.
The server is a simple Node.js server that uses the @modelcontextprotocol/sdk package to create the MCP server, and then the @datastax/astra-db-ts package to connect to the Astra DB collection we created.
Connecting to Astra DB
To connect to Astra DB, we bring in two environment variables, ASTRA_DB_APPLICATION_TOKEN and ASTRA_DB_API_ENDPOINT.
const { ASTRA_DB_APPLICATION_TOKEN, ASTRA_DB_API_ENDPOINT } = process.env;Then we create a DataAPIClient with the application token, and use it to connect to the Astra DB instance.
const client = new DataAPIClient(ASTRA_DB_APPLICATION_TOKEN);
const db = client.db(ASTRA_DB_API_ENDPOINT!);
const monsters = db.collection("monster_list");
And that’s it, we have a connection to Astra DB. From here we can set up our MCP server.
Setting up the MCP Server
First we need to define the server, to do that we bring in the Server class from the @modelcontextprotocol/sdk package.
import { Server } from "@modelcontextprotocol/sdk/server/index.js";Then we initialize it with the name of the server and the version.
const server = new Server(
  {
    name: "monsters-server",
    version: "0.1.0",
  },
  {
    capabilities: {
      resources: {},
      tools: {},
      prompts: {},
    },
  }
);
Then we start the server up:
import { StdioServerTransport } from "@modelcontextprotocol/sdk/server/stdio.js";

async function main() {
  const transport = new StdioServerTransport();
  await server.connect(transport);
}

main().catch((error) => {
  console.error("Server error:", error);
  process.exit(1);
});
Ok, so what’s with the StdioServerTransport? Let's get into that, because as interesting as it is annoying to work it.
Connecting to MCP Servers
There are two ways to connect to an MCP server; STDIO and SSE. SSE means Server Sent Events, and it's a protocol that sits on top of HTTP. Because we want to run the server locally, we are going to use the STDIO transport.
STDIO is “standard input/output”, and it’s the basis of command line interfaces. Every process has access to STDIO. There is STDIN which is the input stream, and STDOUT which is the output stream. Our MCP server is going to listen for events on STDIN, process them and send the results to STDOUT.
The Claude desktop app runs our application as a child process, and then connects to it using STDIO.
Easy, right? Well, not so fast. Well, that depends on how you debug your JavaScript/TypeScript code. If you use console.log to debug, you are going to have a bad time, because... console.log outputs to STDOUT. And STDOUT is the output stream for our MCP server.
So, if you want to debug your MCP server, you are going to have to send your log messages to somewhere else. I use a file for this. But you can do whatever you want.
That’s something you are going to have to look out for. But in the meantime, let’s get back to the server.
Handling Events
From here on out we are going to handle events coming from an MCP client into the MCP server.
The first event we are going to handle is the “list tools” event. When we get this event, we are supposed to return a list of tools that the client can using the ListToolsRequestSchema.
Our code for that looks like this:
server.setRequestHandler(ListToolsRequestSchema, async () => {
  return {
    tools: [
      {
        name: "get_monster",
        description: "Get a dungeons and dragons monster by name",
        inputSchema: zodToJsonSchema(MonsterSchema.pick({ name: true })),
      },
      {
        name: "find_similar_monsters",
        description: "Find similar monsters by name",
        inputSchema: zodToJsonSchema(MonsterSchema.pick({ name: true })),
      },
    ],
  };
});
We are going to support two tools, get_monster and find_similar_monsters. The get_monster tool is going to take a monster name as input, and return the monster data. The find_similar_monsters tool is going to take a monster name as input, and return a list of monsters that are similar to the input monster.
The zodToJsonSchema function is a helper function that converts a Zod schema to a JSON schema. When you specify a tool for an AI to use the convention is that the tool input specification is a JSON schema. In this case our MonsterSchema is a Zod schema that defines the structure of the monster data on DataStax. So we pick the name field from the schema as the input, and then convert it to a JSON schema using zodToJsonSchema.
Now, let’s get into the meat of the server.
Handling tool calls
The next event we are going to handle is the “call tool” event. This event is what happens when the AI calls one of our tools.
server.setRequestHandler(CallToolRequestSchema, async (request) => {
  switch (request.params.name) {
    case "get_monster": {
      const monster = await getMonster(
        request.params.arguments?.name as string
      );
      return {
        content: [
          {
            type: "text",
            text: JSON.stringify(monster, null, 2),
          },
        ],
        isError: false,
      };
    }
    case "find_similar_monsters": {
      const monster = await getMonster(
        request.params.arguments?.name as string
      );
      if (!monster) {
        throw new Error("Monster not found");
      }
      const cursor = monsters.find(
        {
          sort: {
            $vector: monster?.vector,
          },
        },
        {
          limit: 20,
        }
      );
      const monstersList: z.infer<typeof MonsterSchema>[] = [];
      for await (const doc of cursor) {
        monstersList.push(doc as z.infer<typeof MonsterSchema>);
      }
      return {
        content: [
          {
            type: "text",
            text: JSON.stringify(monstersList, null, 2),
          },
        ],
      };
    }
    default:
      throw new Error("Unknown tool");
  }
});
You can handle this call any way you want, but I’ll use a switch statement to handle the two tools we defined.
The first tool is get_monster. When we get this event, we are going to call the getMonster function with the monster name. This function is going to return the monster data, and we are going to return that data to the client.
The second tool is find_similar_monsters. When we get this event, we are going to call the getMonster function with the monster name. This function is going to return the monster data, and we are going to use that data to find similar monsters.
The getMonster function is a helper function that gets a monster from Astra DB. It takes a monster name as input, and returns the monster data.
function capitalizeFirstLetter(str: string) {
  return str.charAt(0).toUpperCase() + str.slice(1).toLowerCase();
}

async function getMonster(name: string) {
  const monster = await monsters.findOne({
    name: {
      $eq: capitalizeFirstLetter(name),
    },
  });
  return monster;
}
And that’s it, we have a fully functional MCP server.
A little about vector search
So this section of the code is pretty interesting:
const monster = await getMonster(request.params.arguments?.name as string);
const cursor = monsters.find(
  {
    sort: {
      $vector: monster?.vector,
    },
  },
  {
    limit: 20,
  }
);
This code gets the original monster data and then it makes another request to find twenty similar monsters using a “vector search”. A vector search is a way to find similar items in a collection. Vectors are just an array of numbers, and the vectors in this case are created using all the stats of the monster; hit points, strength, dexterity, constitution, intelligence, wisdom, and charisma.
In our find we are sorting the monsters based on their euclidean distance from the original monster. It's just like the distance between two points, except that we are using seven dimensions instead of two.
Hooking it up to Claude
The next thing we need to do is build the application and then connect it to the Claude desktop app.
To do that we run npm run build to build the application, that creates an index.js file in the build directory.
Once that’s created we need to edit the claude_desktop_config.json file to add the server config.
Assuming you don’t have any other MCP servers configured, your claude_desktop_config.json file should look like this:
{
  "mcpServers": {
    "monster-server": {
      "name": "monster-server",
      "command": "[path to node]",
      "args": ["[path to this repo]/build/index.js"],
      "env": {
        "ASTRA_DB_API_ENDPOINT": "https://[dbname].apps.astra.datastax.com",
        "ASTRA_DB_APPLICATION_TOKEN": "[token]"
      }
    }
  }
}
Notice that you have to set the ASTRA_DB_API_ENDPOINT and ASTRA_DB_APPLICATION_TOKEN environment variables. It's not going to get them from your environment, it's going to get them from the claude_desktop_config.json file.
Trying it out
Let’s start by firing up the Claude desktop app.
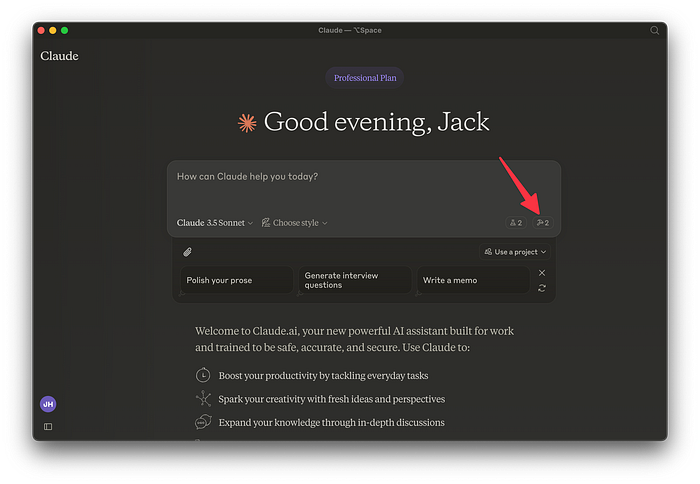
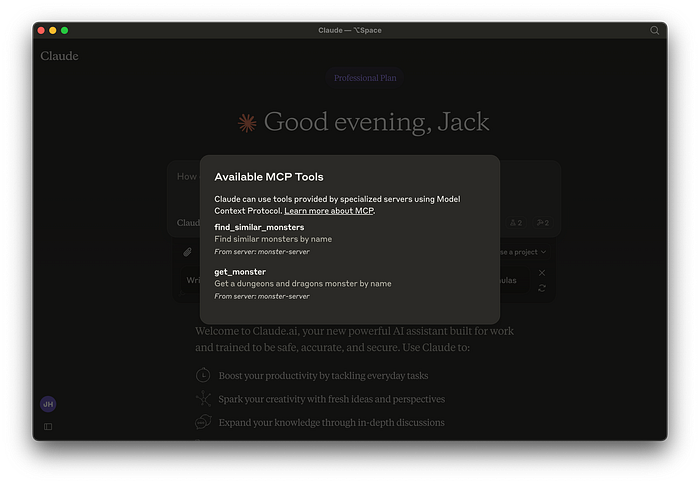
If our MCP server is up and running we should immediately see a hammer icon in the bottom right corner of the prompt input with the number two next to it. Two is the number of tools. And when we click on the icon we can get a list of those tools.
Now that we know the tools are ready to go we can prompt the AI to use them.
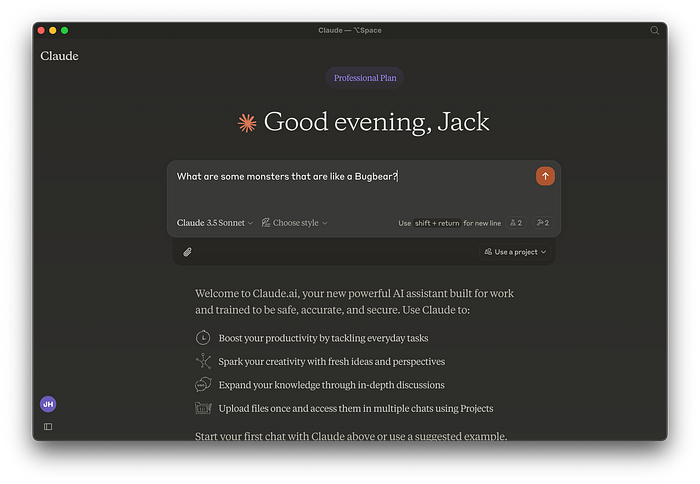
For the prompt I’ll ask Claude about similar monsters to a Bugbear. This will force Claude to call our tools.
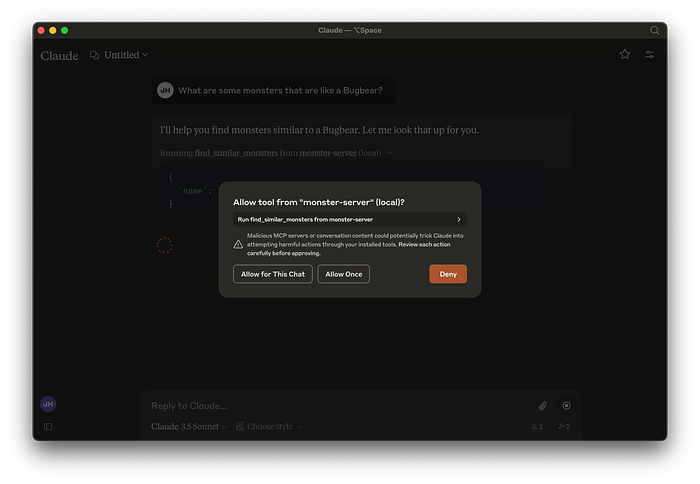
But before it can do that it needs to ask for permission. Which it does for every single chat. Honestly, I find this behavior annoying, but, it is what it is.
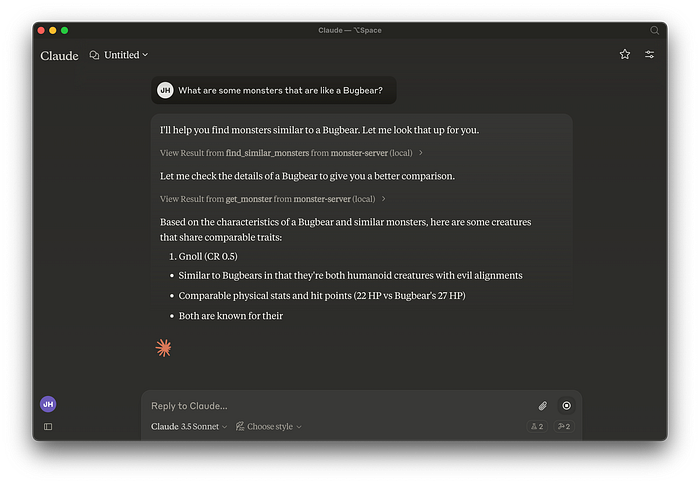
Finally after retrieving the data Claude can tell us what monsters are similar to a Bugbear and why.
Conclusions
There’s a lot more here, honestly. There is an inspector tool that is extremely handy in debugging a server. And there are also different types of things your can serve from an MCP server in addition to tools. For example, resources, images, prompting templates, directories to access. It’s impressive stuff.
It’s also important to think beyond just query tools. You can imaging tools that also act in the real world; sending Discord messages, posting events, etc. Tools open up a world of AI possibilities.
